I can’t resist a sale, especially something on clearance so my craft cabinet is full of fabric that I got for next to nothing. Some are odd shapes and sizes, but I just can’t resist buying them. Finding something to do with them can be a challenge. I can barely close the drawer that holds all of my fabric so I decided to start using it. What better time than now, right? I found this piece of houndstooth fabric that was 10″ wide x 52″ long, perfect for making a scarf! I still consider myself a “beginner” in the sewing department, my specialty is pillows and aprons, but I bought myself a new, fancier sewing machine and I want to put it to use trying new things and crossing my fingers that they turn out. This project took me less than 15 minutes to make and while it’s not perfect, for my first infinity scarf, I’m happy with the results! If I can make this, then so can you!
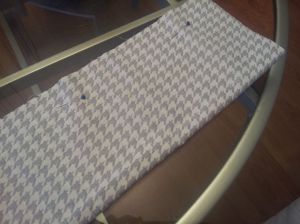
First you want to measure your fabric, I used a cotton fabric, I suggest something that will stretch or you can manipulate easily. You want to be able to wrap it around your neck, you don’t want it stiff. I had a piece that was 10″x52″ but I’d prefer my next scarf to be a little longer and thicker so I suggest these measurements 12″x60″ but you could make it as long or as thick as you’d like. Once you’ve measured and cut your fabric, fold it in half with the patterned sides facing each other, and pin along the edge that you will sew.
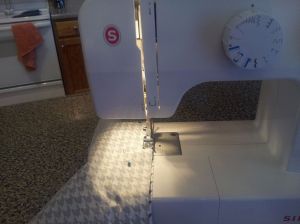
After you’ve pinned all the way down it’s time to start sewing. I used a zig-zag stitch so it would be stronger than just a straight stitch. You’ll be pulling on this and you don’t want it unraveling.
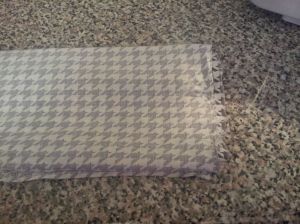
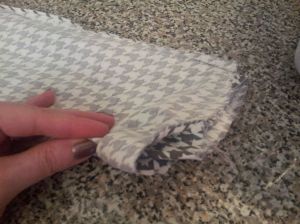
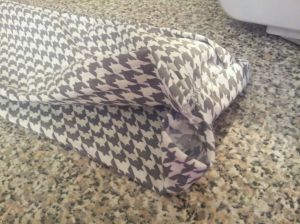
Sew all the way down the long edge of the scarf and stop, next you need to pull half of the scarf through the tube you’ve created so you can sew the short end. The outside you want to be the back of the fabric, the inside pulled through the tube to show the patterned side of the fabric. In the picture you can see a little bit of the inside fabric peeking through. Line up the seam and the edges and sew about 3/4 of the way across sewing over the seam from the long edge and leaving an opening at the other end to pull the fabric through.
This is the part that took me the longest, pulling the fabric through the opening you left. Once you have all the fabric pattern side out, it’s time to hand stitch the opening. Don’t forget to knot the end of your thread! I don’t know the technical terms for stitching, but my sister taught me a way to hand stitch where the seams don’t show. Maybe I’ll have her do a tutorial on that since she’d be much better at explaining it than me, but for now, do your best at stitching it as neatly as you can.
Once the hole is closed, iron out any wrinkles if necessary and it’s ready to wear. Wear it long, or my favorite way is to double it.

I LOVE IT !! so cute !! 🙂
LikeLike
Thanks Girl, looking forward to making yours!
LikeLike
that turned out really nice, love the material
LikeLike
Thanks, Liz! I’m going to make a bunch and I want you and the girls to pick one when they are all done!
LikeLike
ooh cool ! (as Cade would say)
LikeLike
Very nice. Clever babe!
LikeLike
Thanks honey, you are my biggest supporter and your support and encouragment for this blog means the world to me!
LikeLike
Good job! Love it!
LikeLike
You might just have a surprise in your mailbox soon Aunt Sherry 😉
LikeLike